By Azura · Updated July 2026 · Raised Garden Hub is reader-supported. When you buy through links on our site, we may earn an affiliate commission at no extra cost to you.
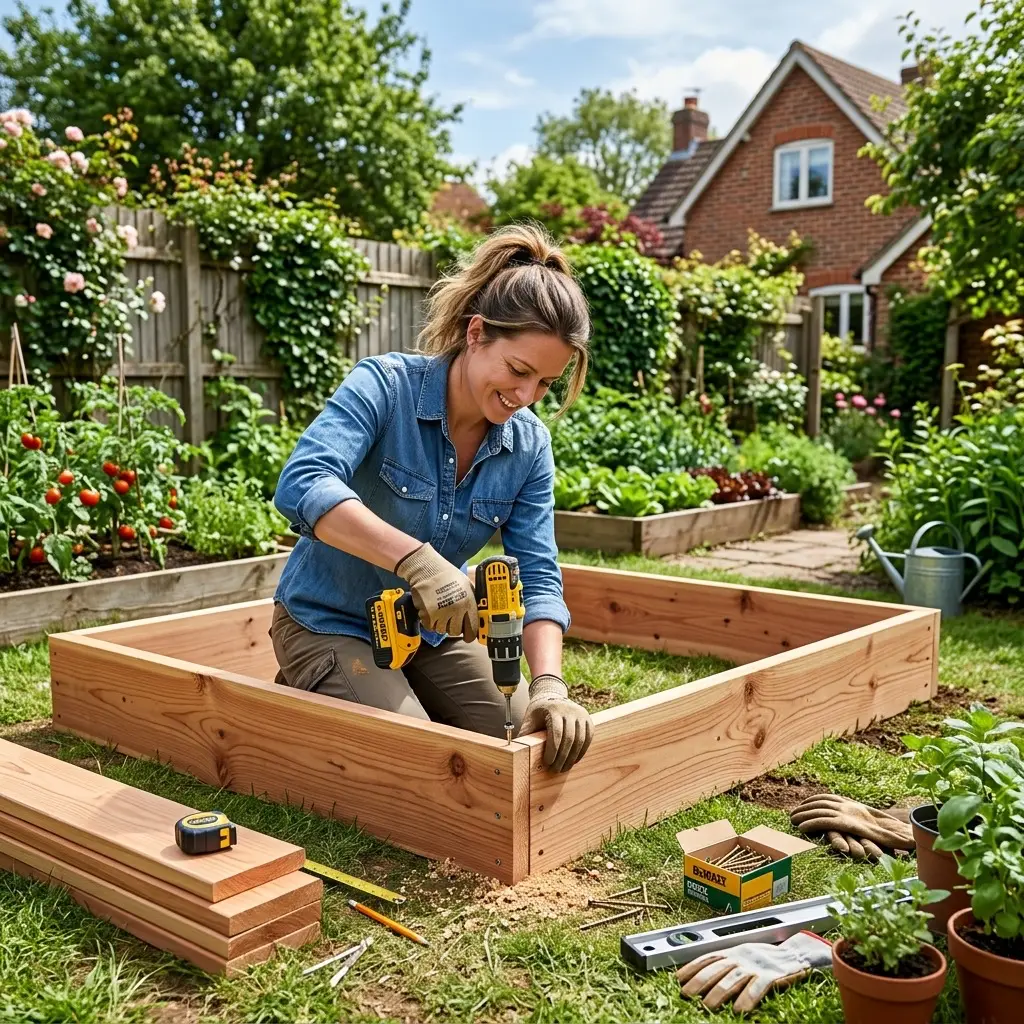
You can build a solid raised bed in an afternoon with basic tools and lumber from any big-box store. This guide covers choosing the right material, what you need, and a step-by-step build — plus a kit option if you would rather skip the sawing.
Choosing your material
The material you pick determines how long the bed lasts and whether it is safe next to food crops.
Wood
Cedar heartwood is naturally decay-resistant and untreated boards avoid added preservatives. Species, heartwood content, board thickness, drainage, climate, and joinery determine service life. Redwood heartwood is another naturally durable regional option. For the evidence and limitations, see the best wood for raised garden beds.
Untreated pine and spruce are often cheaper and generally less naturally decay-resistant. Treat them as shorter-term options and inspect them; we cannot assign a universal replacement year.
Pressure-treated lumber: modern ACQ and CA copper-based treatments are a genuine grey area. The EPA has cleared them for residential use including garden beds, and studies have not found meaningful uptake in edible crops. That said, many gardeners prefer to avoid any treated wood near food, and cedar is close enough in price that it is hard to justify the trade-off. The old CCA-treated wood with arsenic is a different story — never use it, and if you find old railroad ties or reclaimed green-tinted lumber, leave it out.
Avoid: railroad ties, creosote-treated timbers, and any painted or stained salvage wood of unknown origin.
Metal
Coated-steel and weathering-steel kits avoid biological wood decay and usually arrive without lumber cutting. Service life depends on alloy or coating, damage, drainage, soil chemistry, climate, and installation. For coating and soil-pH evidence, read are galvanized raised garden beds safe.
Cedar or galvanized steel are the two builds worth doing. Everything else is a compromise worth knowing about before you buy.
Tools and materials list
- Cordless drill and driver bits
- Exterior screws (2.5 to 3 inch, coated or stainless)
- Saw — a circular saw, miter saw, or hand saw; alternatively have the lumber yard cut boards to length
- Level (4 ft or longer is easier)
- Tape measure and speed square
- Rubber mallet (optional but useful for adjusting corners)
- Lumber: for a 4×8 ft bed, two 8 ft boards and two 4 ft boards per course; add corner posts (2×2 or 4×4) cut to bed height
- Cardboard boxes or hardware cloth for the base layer
- Soil mix to fill — see how to fill a raised garden bed for the best blend
Not sure what dimensions to build? Our guide to the best size for a raised garden bed covers ideal depth, width, and length, and the raised bed size calculator helps you plan board lengths and quantities.
Step 1: Pick and prep your site
Choose a spot with at least 6 hours of direct sun per day — 8 is better for fruiting crops like tomatoes and peppers. A 4×8 ft bed is the standard starting size because you can reach the center from either long side without stepping in.
Clear the ground of large rocks and debris. If grass or weeds are present, mow them short or pull the worst offenders. You do not need to remove sod — you will smother it in the next step.
If the site slopes noticeably, mark the low corner now. You will level the frame there.
Step 2: Lay a weed barrier on the ground
Before the frame goes down, cover the footprint with cardboard from moving or appliance boxes. Overlap the edges by 6 inches so nothing sneaks through. The cardboard blocks light, kills the grass underneath, and breaks down into organic matter over the next season. This is the core idea behind no-dig gardening with raised beds.
If gophers or voles are a known problem in your yard, staple or lay a sheet of half-inch hardware cloth instead. Cut it slightly larger than the bed footprint so the frame edges hold it in place.
Step 3: Cut boards and assemble the frame
For a single-course 4×8 ft bed using 2×10 lumber (which gives you about 9.25 inches of depth):
- Cut two boards to 8 ft and two boards to 45 inches (so the short ends sit inside the long sides, keeping the outer dimension exactly 4 ft × 8 ft).
- Stand a long board on edge. Hold a short board against one end, flush at the top and outside face. Drive two or three screws through the long board into the end grain of the short board. Pre-drill pilot holes to avoid splitting.
- Repeat for all four corners. You now have a rectangle.
- Set a corner post (2×4 or 2×2 cut to bed height) inside each corner joint and screw through the boards into the post. This is the strongest way to join corners and makes it easy to add a second course later.
- On beds 6 ft or longer, add a center cross-brace — a short board screwed across the middle on each long side, or a stake driven into the ground and screwed to the board. Without it, filled beds bow outward.
For a second course, stack and stagger the boards like brickwork (joints offset), screwing the top course into the corner posts.
Step 4: Level the frame
Set the assembled frame on the cardboard. Place your level across the top — check both long sides and diagonally corner to corner.
- If one corner is low, slide flat stones, gravel, or a cedar shim under it.
- If the slope is more than an inch, dig down slightly on the high side rather than shimming up the low side — shimmed bases can shift.
A level bed keeps water and soil from pooling on one end and makes the bed look right once it is planted.
Step 5: Fill the bed
Do not fill a framed bed with compost alone. Penn State Extension currently gives 70% quality soil and 30% finished compost as a starting mix; Oregon State advises up to 25% compost by volume in its raised-bed fill example. Treat those as quote scenarios, then adjust for the actual soil texture, compost analysis, drainage, crop, and soil test.
Woody lower fill is a separate site-specific design. It decomposes and settles, changes the required growing-mix volume, and is not a universal “bottom third” recommendation. Check the frame maker’s fill instructions and the crop root zone before using it. Use the soil calculator to calculate full volume first.
How deep you want to go depends on what you are growing. See how deep a raised garden bed should be and what to put at the bottom for more detail on layering options.
Budget and time
| Build | Typical cost | Time |
|---|---|---|
| DIY cedar 4×8, single course | $80–$150 | 2–3 hours |
| DIY cedar 4×8, two courses | $150–$250 | 3–4 hours |
| Metal kit 4×8 | $100–$200 | 30–60 minutes |
| Pine budget build 4×8 | $30–$70 | 2–3 hours |
Costs vary by region. Cedar is more expensive in the Southeast than the Pacific Northwest. Metal kits vary widely by brand and gauge.
Would you rather buy a kit?
If cutting and drilling is not your thing, a kit can remove lumber work. Metal modular kits are generally bolt-together; verify the exact parts list, tools, manufacturer estimate, and site-preparation needs. See the raised garden beds guide for current reviewed specifications.
Common mistakes to avoid
- Beds wider than 4 ft — you cannot reach the center without stepping in and compacting the soil
- Skipping the center brace — long beds bow outward under soil pressure, especially after watering
- Pure garden soil or bagged topsoil alone — both compact heavily in a raised bed; always mix in compost
- Boards flat instead of on edge — lay 2×10 boards standing on their 10-inch face, not their 2-inch face
- Ignoring drainage — never seal the bottom completely; roots and worms need access to the native ground
Frequently asked questions
What wood is safe to use for a raised garden bed?
Cedar and redwood are the top choices — both are naturally rot-resistant and contain no chemicals that leach into soil. Untreated Douglas fir and pine work too but rot faster. Avoid older pressure-treated lumber marked CCA (chromated copper arsenate), which contained arsenic. Modern pressure-treated wood uses copper-based preservatives (ACQ or CA) that the EPA considers safe, but many gardeners still prefer to stay with cedar or redwood near food crops. Never use railroad ties or creosote-treated wood.
Do raised garden beds need a bottom?
No solid bottom — you want drainage and access for earthworms and soil microbes. Leave the bed open to the native ground beneath. You can lay cardboard or a layer of hardware cloth on the ground before setting the frame. Cardboard smothers weeds and breaks down into organic matter. Hardware cloth (half-inch mesh) blocks gophers and voles if burrowing pests are a problem in your area.
What is the cheapest way to build a raised garden bed?
Untreated pine or spruce is often the lower-cost new-lumber option, but local prices, dimensions, hardware, delivery, and tools determine the total. It is generally less naturally decay-resistant than cedar heartwood; do not assume a fixed replacement year. Avoid reclaimed wood of unknown treatment or contamination.
How long does it take to build a raised garden bed?
Build time varies with site preparation, cuts, tools, helpers, frame design, fastener count, leveling, and fill delivery. We have not run a timed build study. Use the exact kit estimate only as a planning input and allow extra time for leveling and missing or damaged parts.
Do you need landscape fabric in a raised garden bed?
Landscape fabric on the bottom is not necessary and is often counterproductive. It blocks earthworms and limits root depth. Cardboard is a better weed barrier — it breaks down over one to two seasons and feeds the soil biology. If you have aggressive perennial weeds, overlap thick cardboard sheets with no gaps before setting your frame. Skip landscape fabric on the sides and bottom unless you are building over a hard surface like a deck or concrete.
How deep should a raised garden bed be?
Six inches is the minimum for shallow-rooted crops like lettuce and herbs. Twelve inches works well for most vegetables including tomatoes, peppers, and carrots. If you are building on concrete or a deck with no access to native soil, go at least 12 inches deep, and 18 inches for root vegetables like parsnips and deep-rooted tomatoes. Deeper beds cost more to fill but give roots more room and retain moisture longer.